How to Paint a Fabric Chair
This post contains some affiliate links for your convenience. Click here to read my full disclosure policy.
Today, I will take you step by step on how to paint a fabric chair with chalk paint. For beginners.
I am so excited to show you how to paint a fabric chair.
The transformation is unbelievable!
It’s a two-day process, so give yourself some time.
Before you paint a fabric chair, make sure your furniture can be used for this project. Here is a tip.
The fabric should be smooth.
Not bumpy.
It can have some texture.
But the main type of fabric needs to be a tight weave like:
Canvas.
Linen.
Vintage fabric on antique chairs or sofas.
All these are examples.
In the photo below, you can see that the fabric is ugly.
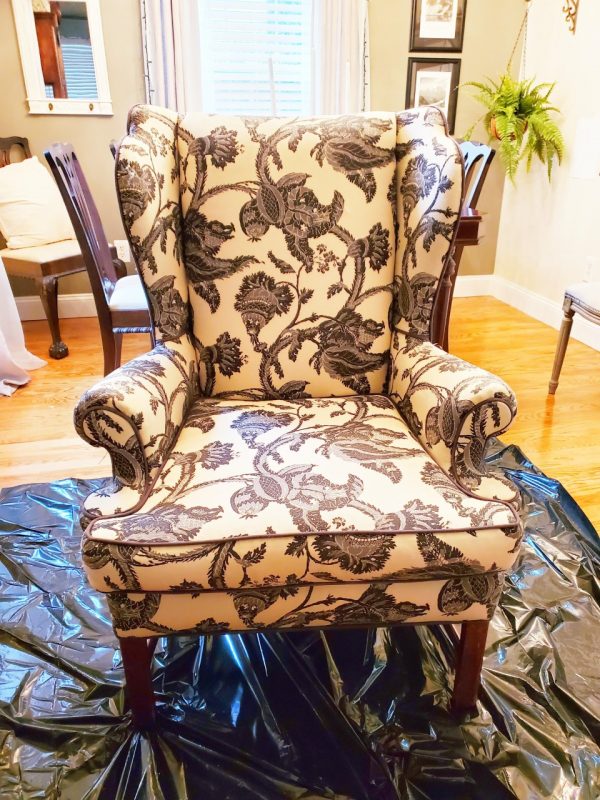
At least, it was to me. I paid $20 for it.
All that mattered was whether the fabric was perfect for painting.
The paint covered it up, making it exactly what I wanted to match my home.
Now onward to the step-by-step instructions.
Would you rather opt for video tutorials instead of step-by-step instructions? I’ve got you covered with a comprehensive video tutorial that guides you through painting an antique sofa. These steps are similar to how to paint a fabric chair.
How to paint a fabric chair with chalk paint.
Total time: 2 days
Materials Needed

Step-by-Step Instructions
Step 1: Wipe down your chair with a damp cloth. I used microfiber cloths.
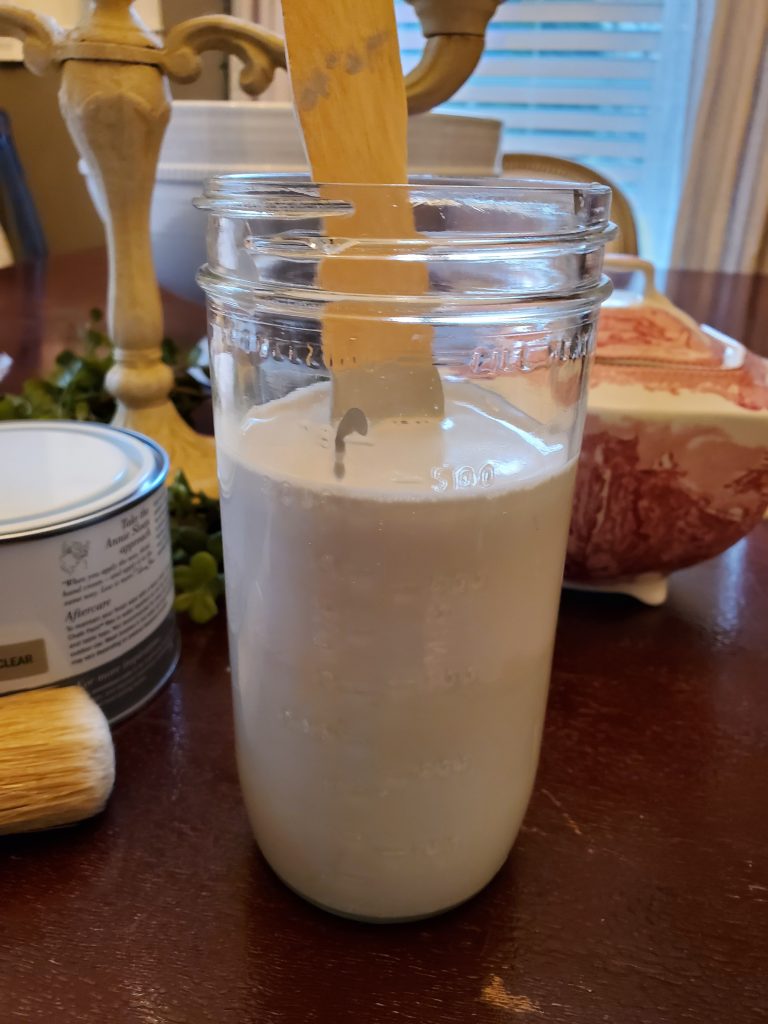
Step 2: Use the paint stick to stir the paint in the can thoroughly.
Step 3: Mix 1/2 water with 1/2 chalk paint.
Spray the fabric.
Step 4: Spray water onto the fabric as you are painting.

To get the paint to absorb into the fabric, you will need to spray it with water before applying the paint.
This will allow the paint to dye the fabric into your chosen color for your project.
Start at the top of the chair; spray the area with water first, then paint, for example.
Repeat this by spraying the fabric with water first, then paint.
You will only need to do this for the first coat of paint.
Paint the fabric.
Step 5: Dip the brush into the paint. Making sure not to overload with paint.
Now onto Step 6: Paint the entire fabric from the top to the bottom of the chair.

This includes the cushion(s) if your chair has one or two.
The fabric can vary and absorb the paint quickly.
You will know if you need a second coat as it dries.
From experience, the second coat is usually needed to give an even and smooth look.
Apply a second coat.
Step 7: Apply a second coat after the chair has slightly dried.
No need to respray the fabric with water.
If your chair is a solid color, it may only take two coats.
If it has dark designs, like the one I’m doing, it could take up to 4 coats.
On to Step 8: Let the paint dry overnight.
Step 9: Open the small can of chalk paint for the legs and stir with a paint stick. I used the Original color.

Step 10: Lay the chair on its side.

Step 11: Continue to paint the legs with 2-3 coats.
Let it fully dry between coats.
It can take 20-30 minutes to be dry enough to apply the extra layers of paint if you’re impatient like me.
But follow the guidelines on the can for proper dry time.
You will get a better result.
Ask me how I know.
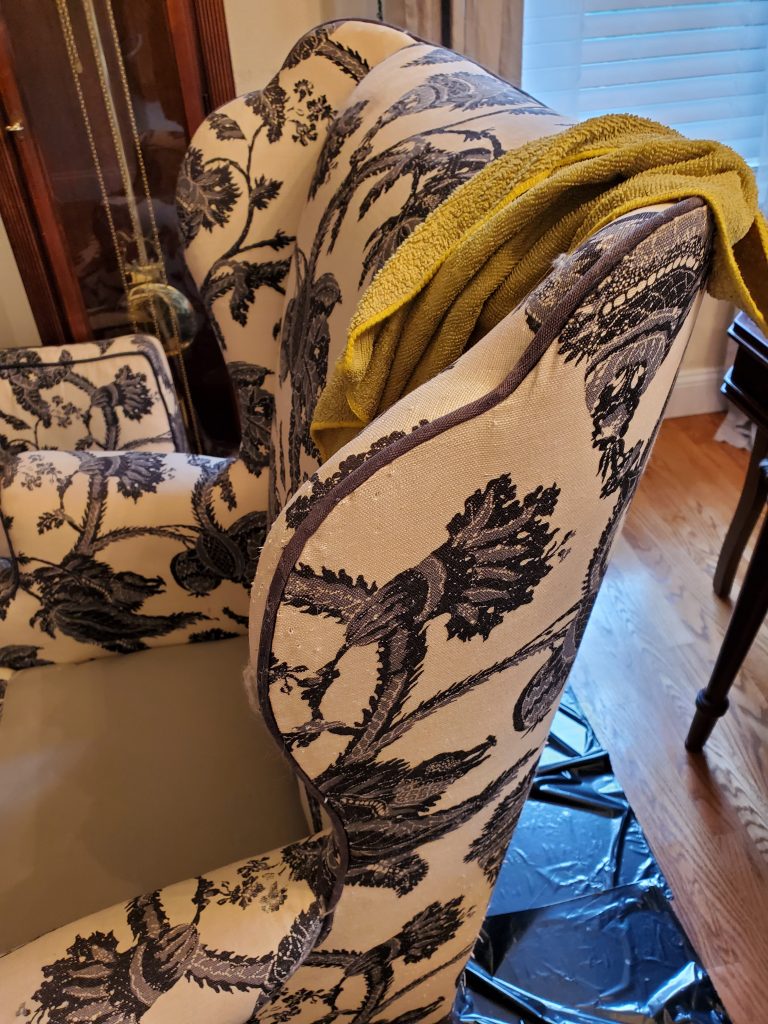
Step 12: Take the chair and cushions (if this applies) outside or to an open area and lightly sand down the entire chair using very light strokes.

The smoother your sandpaper, the better.
Step 13: For a rustic or vintage look, sand the legs along the corners and edges to reveal the wood underneath, as seen in the photo below.

Now onto Step 14: Then take the chair back inside.
Step 15: Open the can of clear wax.
Step 16: Put a clean, soft cloth into the wax and grab a good silver dollar-sized amount with the cloth.

Apply the wax starting at the top, making a circular motion to rub it into the fabric.
Apply the wax to the fabric, the legs, and all sides of the cushions.
Don’t over-apply.
There should be no globs of wax.
Only a smooth layer rubbed into the fabric.
Final steps.
Step 17: Take a separate clean cloth and rub any overage of wax by doing a good wipe down from top to bottom.
Onto Step 18: Let the chair dry thoroughly.
Step 19: To ensure the chair is ready to sit on, take a damp cloth and do a final wipe down. You are now done!

How to Paint French Chairs in 6 Easy Steps
You can find more video tutorials on our YouTube Channel
My favorite supplies
Here are some of the supplies that I used when doing this project!

mICROFIBER TOWEL
These handy towels are useful for cleaning my home & adding wax to chalk-painted furniture.

Wooster brush
Good quality paint brush that cleans up easily and holds up to all of my DIY and craft projects.

Glass spray bottles
I use these 16 oz spray bottles for my all-natural house cleaner or add water when spraying the fabric to paint a chair with chalk paint.
Answers to your questions about painting a fabric chair.
Will the wax get on my clothes?
No. Once the wax dries, it is safe to sit on.

How to Paint a Fabric Chair with Chalk Paint
Equipment
- Small 1 inch paint brush
- Spray Bottle
- 120 grit Sandpaper
- Plastic cup to put paint in
- Cloths you don't mind getting wax and paint on
- Drop cloth, tarp or large garbage bag to protect your floors
Materials
- 1 Litre Annie Sloan Chalk Paint Paris Grey
- 1 Sample Pot Annie Sloan Chalk Paint Original White
- 1 500 ml Annie Sloan Clear Wax
- 1 Annie Sloan Paint Brush Preferably the large but small will do.
Instructions
- Step 1: Wipe down your chair with a damp cloth. I used microfiber cloths.

- Step 2: Use the paint stick to stir the paint in the can thoroughly.
- Step 3. Mix 1/2 water to 1/2 chalk paint.

- Step 4: Using the spray bottle, spray down the entire chair with water.

- Step 5: Dip brush into paint. Not overloading with paint and do circular strokes starting at the top of the chair.
- Step 6: Paint the entire fabric chair with chalk paint . This includes the cushion(s) if your chair has one or two. The fabric can vary. It can absorb more or less paint.

- Step 7: After the chair has slightly dried, apply a second coat. No need to respray the fabric with water. If your chair is a solid color it may only take two coats. If it has dark designs, like the one I’m doing, it could take up to 4 coats.
- Step 8: Let the paint dry overnight.

- Step 9: Open the small can of chalk paint for the legs and stir with a paint stick. I used the Original color.

- Step 10: Lay chair on its side.
- Step 11: Paint the legs with 2-3 coats of paint. Letting it dry fully between coats. It can take only 20-30 minutes to be dry enough to apply the extra layers of paint, if your impatient like me.
- Step 12: Take chair and cushions (if this applies) outside or in an open area and lightly sand down the entire chair using very light strokes. The more smooth your sandpaper the better.
- Step 13: For a rustic or vintage look, sand the legs along the corners and edges to reveal the wood underneath, as seen in the photo of this chair.

- Step 14: Take chair back inside.
- Step 15: Open the can of clear wax.
- Step 16: Put a clean soft cloth into the wax and grab a good silver dollar size amount with the cloth. Apply the wax starting at the top doing a round circular motion to rub it into the fabric.

- Step 17: Take a separate clean cloth and rub any overage of wax by doing a good wipe down from top to bottom.
- Step 18: Let the chair dry thoroughly.
- Step 19: To make sure the chair is ready to sit on, take a damp cloth and do a final wipe down. You are now done.
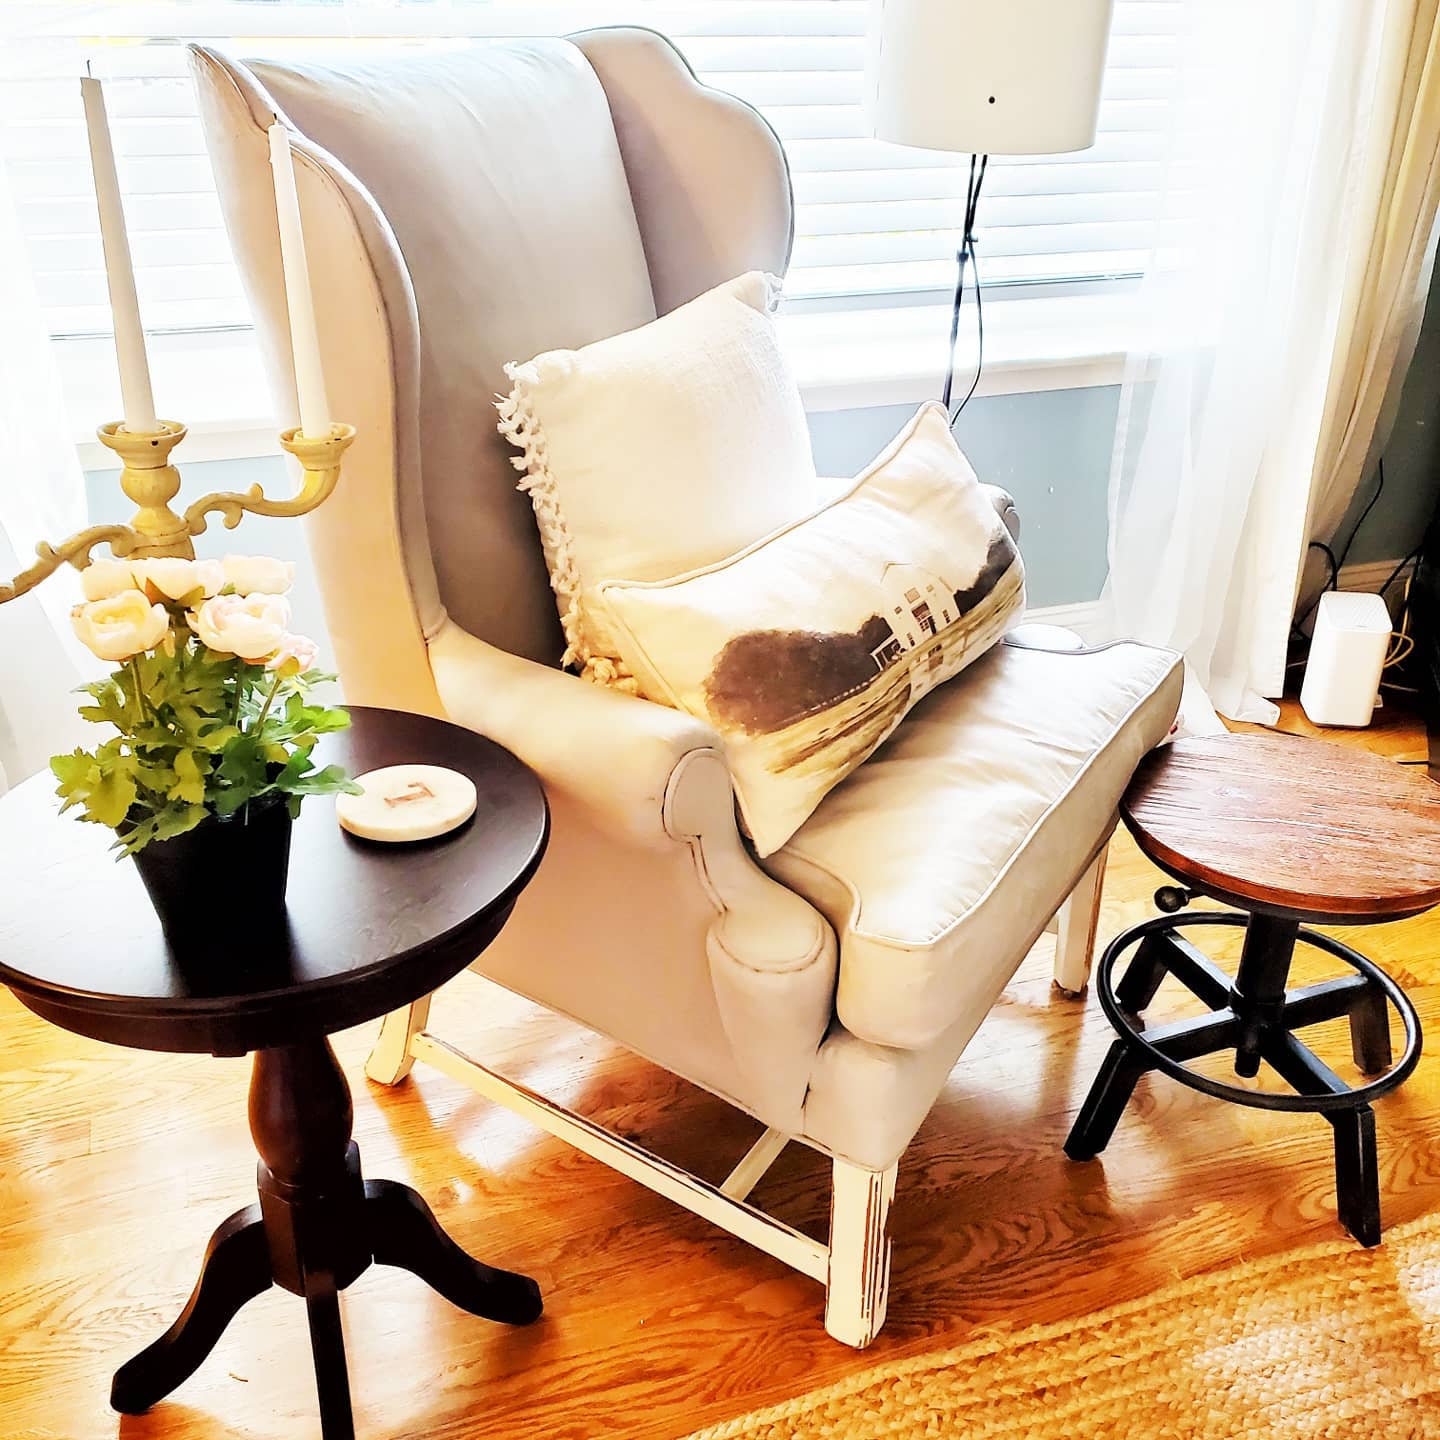
Other fabric furniture I painted with Annie Sloan chalk paint.
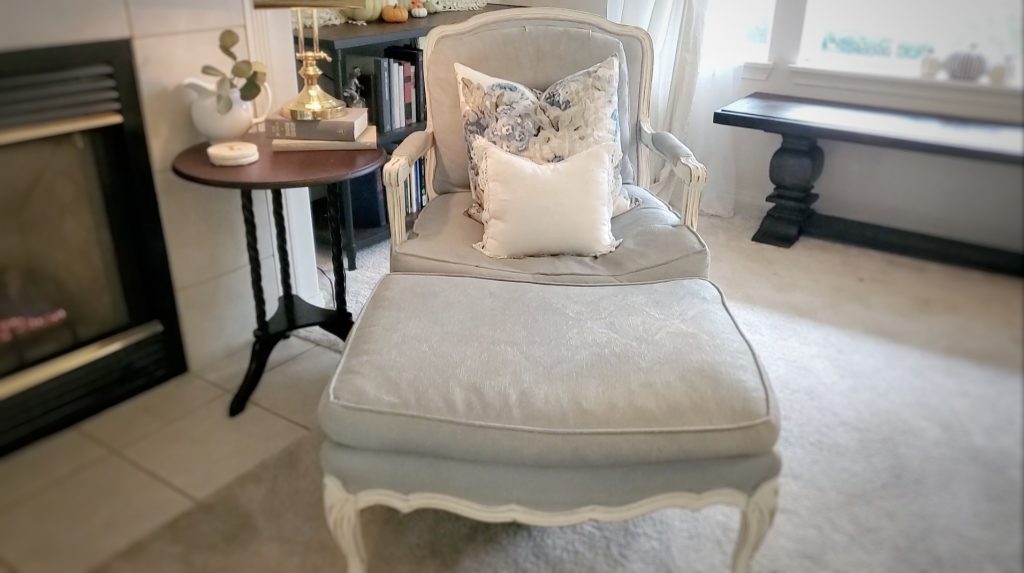
In the photo above, I painted this antique chair and ottoman with the same color, Paris Grey, but painted the wood in the Original White.
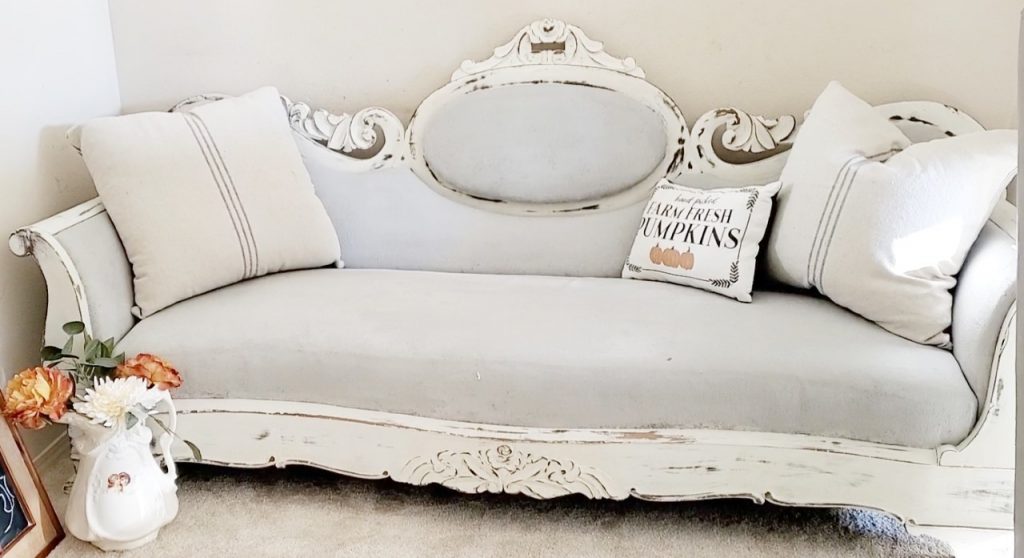
The antique settee below was painted with the colors Graphite and Original white.

This is in my entrance for guests to sit when taking off or putting on their shoes.
Plus, this antique sofa. I used the colors Paris Grey diluted with half Old White. For the wood, I used the Old White color.
Information about Annie Sloan’s paint.
Follow this link to find the store nearest you. To find an online store, follow this link.
Hopefully, this taught you how to create beautiful masterpieces from ugly old furniture that would most likely get thrown away.
Now you can take this tool and paint almost anything.
Furniture and pieces you can paint.
The list is endless of things you can paint with chalk paint. Some ideas are as follows:
- Couches
- Loveseats
- Footstools
- Wall shelving
- Wood tables
- End tables
- Consoles
- Cabinets
- Armoires
- Fireplaces
- Frames (here is a tutorial)
- Or any wood surfaces.
Where to find affordable, beautiful pieces of furniture.
You can find furniture on these apps:
- Craiglist.com
- Letgo
- Facebook Marketplace
You can find furniture at:
- Second-hand stores
- Goodwill
- Value Village
- Antique stores
Check out my other tutorial using chalk paint. Here I will share how to makeover Goodwill frames.
Plus, I share a tutorial on how to paint an antique sofa here.
Here is a video showing how to paint an antique sofa.
Thank you for coming to Victorian Lane Farms.
Did you make this DIY?
We would love to see what you have created, so mention us @victorianlanefarms or tag us using #victorianlanefarms to see your creations!


I couldn’t see your link. So glad you love doing DIYs. It sure is a fun way to make something unique, for sure. Thanks for visiting my blog.
I have been looking for a DIY link like yours to work on my diningroom for so long. This is great because I have two really ugly yellow stripe color chairs that I want blue or grayish and this looks like something I might be able to do!!
You can do it! It’s really more simple than it seems. I’m not good with painting in general, but this technique does such an amazing job, it’s addicting. I’d love to hear how yours turns out. So glad you find this tutorial useful!
Hi! This looks beautiful 😀 does the fabric feel stiff or sticky from the wax that was rubbed in? Have you had to clear the painted fabric after application?
Thanks for your help.
Hi Laurie! Once the wax is fully dried, it isn’t sticky or stiff. Once you’ve painted the fabric, you have to sand it then yes, you do take a wet cloth to wipe off the dust. I hope that helps. Thanks for your questions and coming by.
Thank you for sharing!
You are welcome!
Thank-you for sharing your talents.
You are so welcome!
Hello Ester, this is a beautiful idea for changing your decor color scheme. Can you do the same thing with patio furniture?
Yes! I don’t know what kind of material your patio furniture is. But you can paint most anything. There are amazing patio furniture spray paint and paint at your local hardware store. It’s a wonderful way to refresh what you already have. Thanks for the question.