11 Easy Steps to Setting a Fall Table

This post contains some affiliate links for your convenience. Click here to read my full disclosure policy.
Today, I’ll take you step by step on how I decorated my dining table for fall.
For this fall table, I wanted to make it simple.
I placed washable placemats for easy cleanup between meals and skipped the tablecloth.
This made family gatherings a breeze, and I want to show you how I put it all together.
Here are the 11 steps to setting a Fall table.
Step 1: First thing first for setting a fall table is to clear off the summer decorations.
I have one large tote bag below that holds my seasonal decorations. Here’s a link to the fall bag, here.
Accept for Christmas, of course. It’s not easy to squeeze all those jolly, joyful decorations into one bag!
So, I remove the spring and summer florals and put them in a Spring/Summer tote bag I keep in our attic—link to the Spring/Summer bag I use here.
I’ve been trying to minimalize my décor lately.
Giving myself this boundary of keeping it to one bag has helped me to keep it under control.
Not an easy task!

I pulled down the Fall tote bag above from my attic. What a rush of excitement to unzip the bag to see all my fall goodies!
Happy day!
Step 2: I wipe things down, including the dining room chairs.
I gave my table and chairs a good washing.
Here’s the link to my favorite all-natural cleaner I use for all surfaces.
This year, I decided not to add a tablecloth.
I wanted a simple look.
To start, I need to tell you.
My home is not perfect by any means.
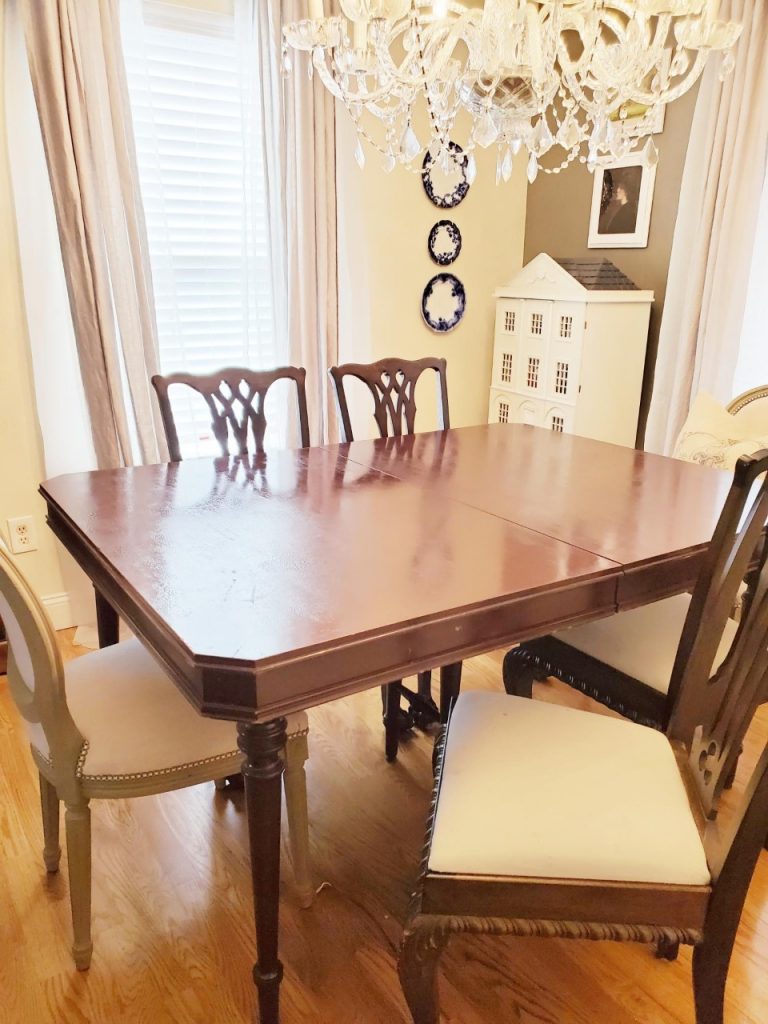
My dining table was found for free on the side of a road with just a blanket covering it to keep it dry on a gloomy rainy day.
I live in Seattle, where rain is just the way it is.
I brought it home and spray-painted the top with mahogany-colored paint.
Gasp! I know you don’t treat beautiful old wood that way!
It’s held up over the last 12 years.
It’s not perfect, but you know what?
I’m ok with that.
Now, for the next step.
I love this part since it’s like pushing a reset button and starting over.
Step 3: I put down Pottery Barn blue damask placemats.
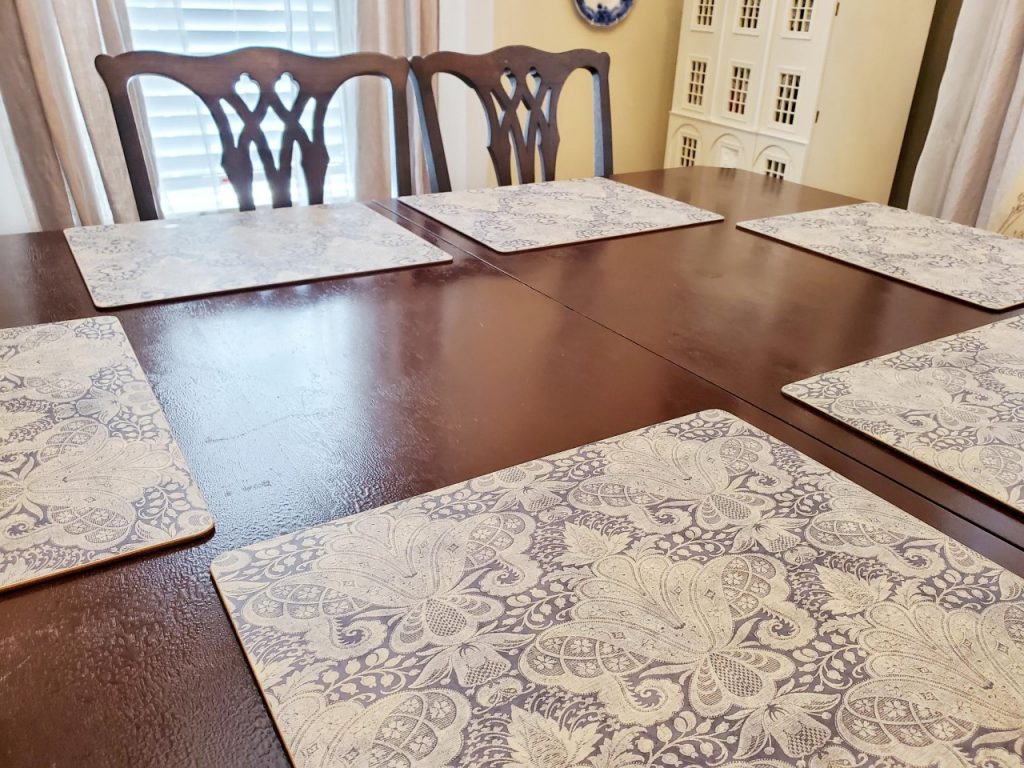
I have extensions for this table that can seat up to 12 people.
But today, I left out the extensions since I will set the table for six.
Step 4: Added Pottery Barn wooden chargers.
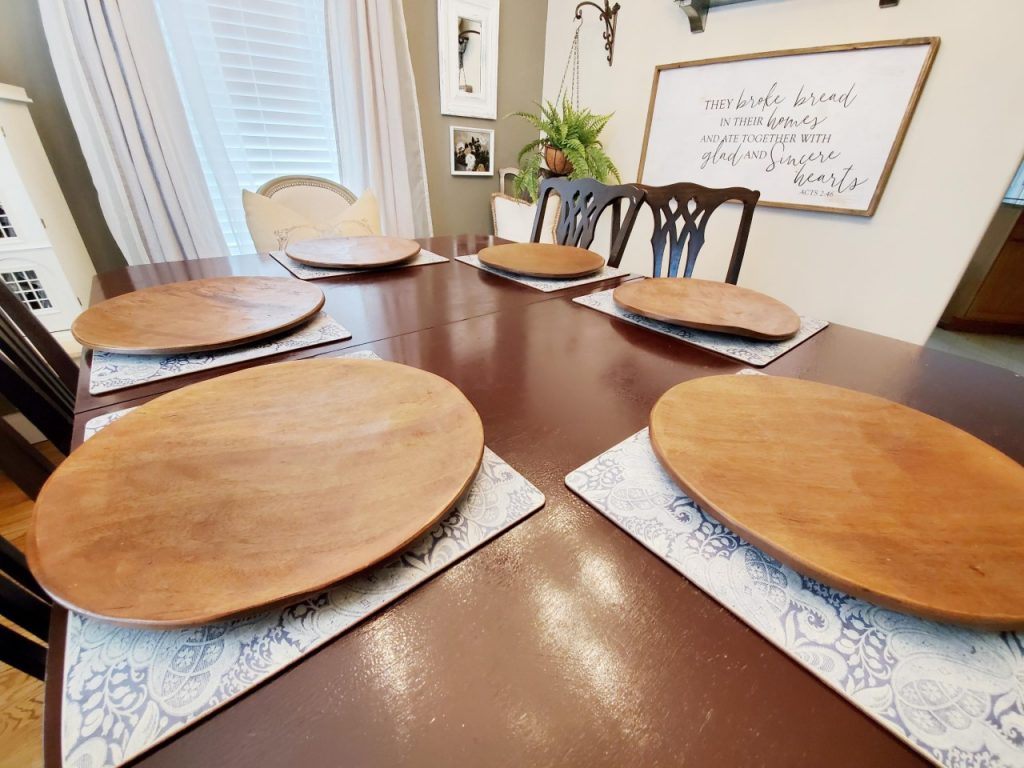
Adding these warm wood chargers adds a fall color without being over the top.
I love orange for fall, but sometimes it’s overwhelming in my more neutral color scheme in my home.
During the 75% off sale at Potterbarn this past year, I bought the chargers and placemats. I scored a deal!
The regular price for these chargers is an investment. If you like these, I’m linking similar ones here.
Wait for the end-of-the-season sales at Pottery Barn to score a good deal.
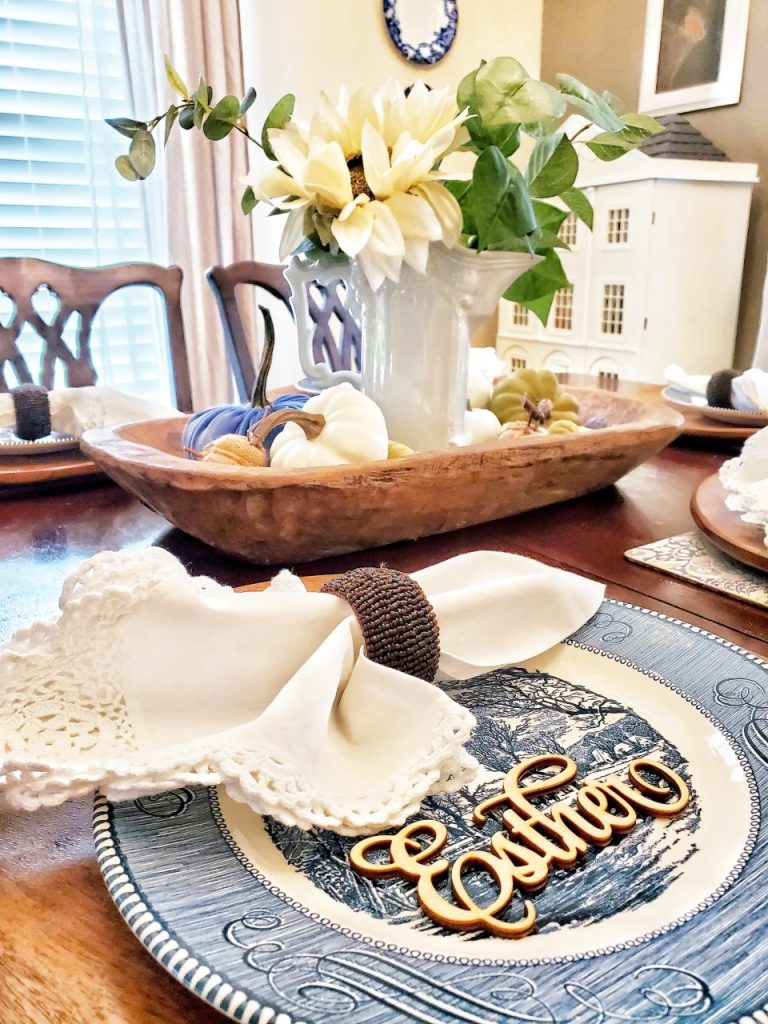
Step 5: I placed my Currier and Ives plate on the wood charger.
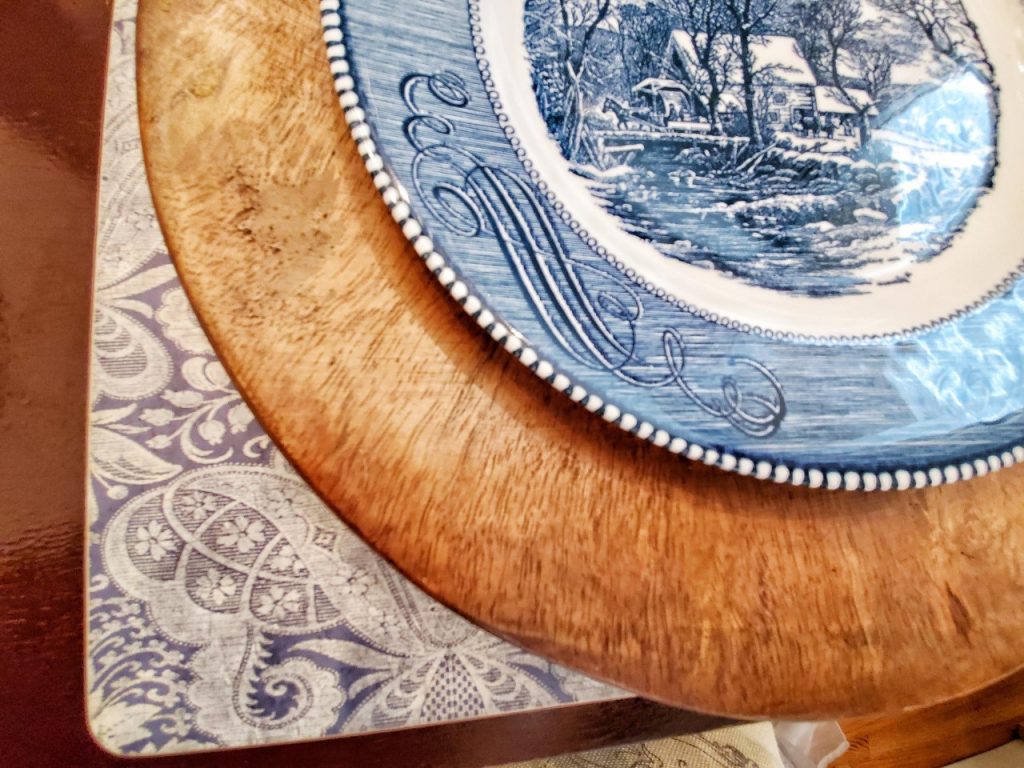
I think this brings it all together.
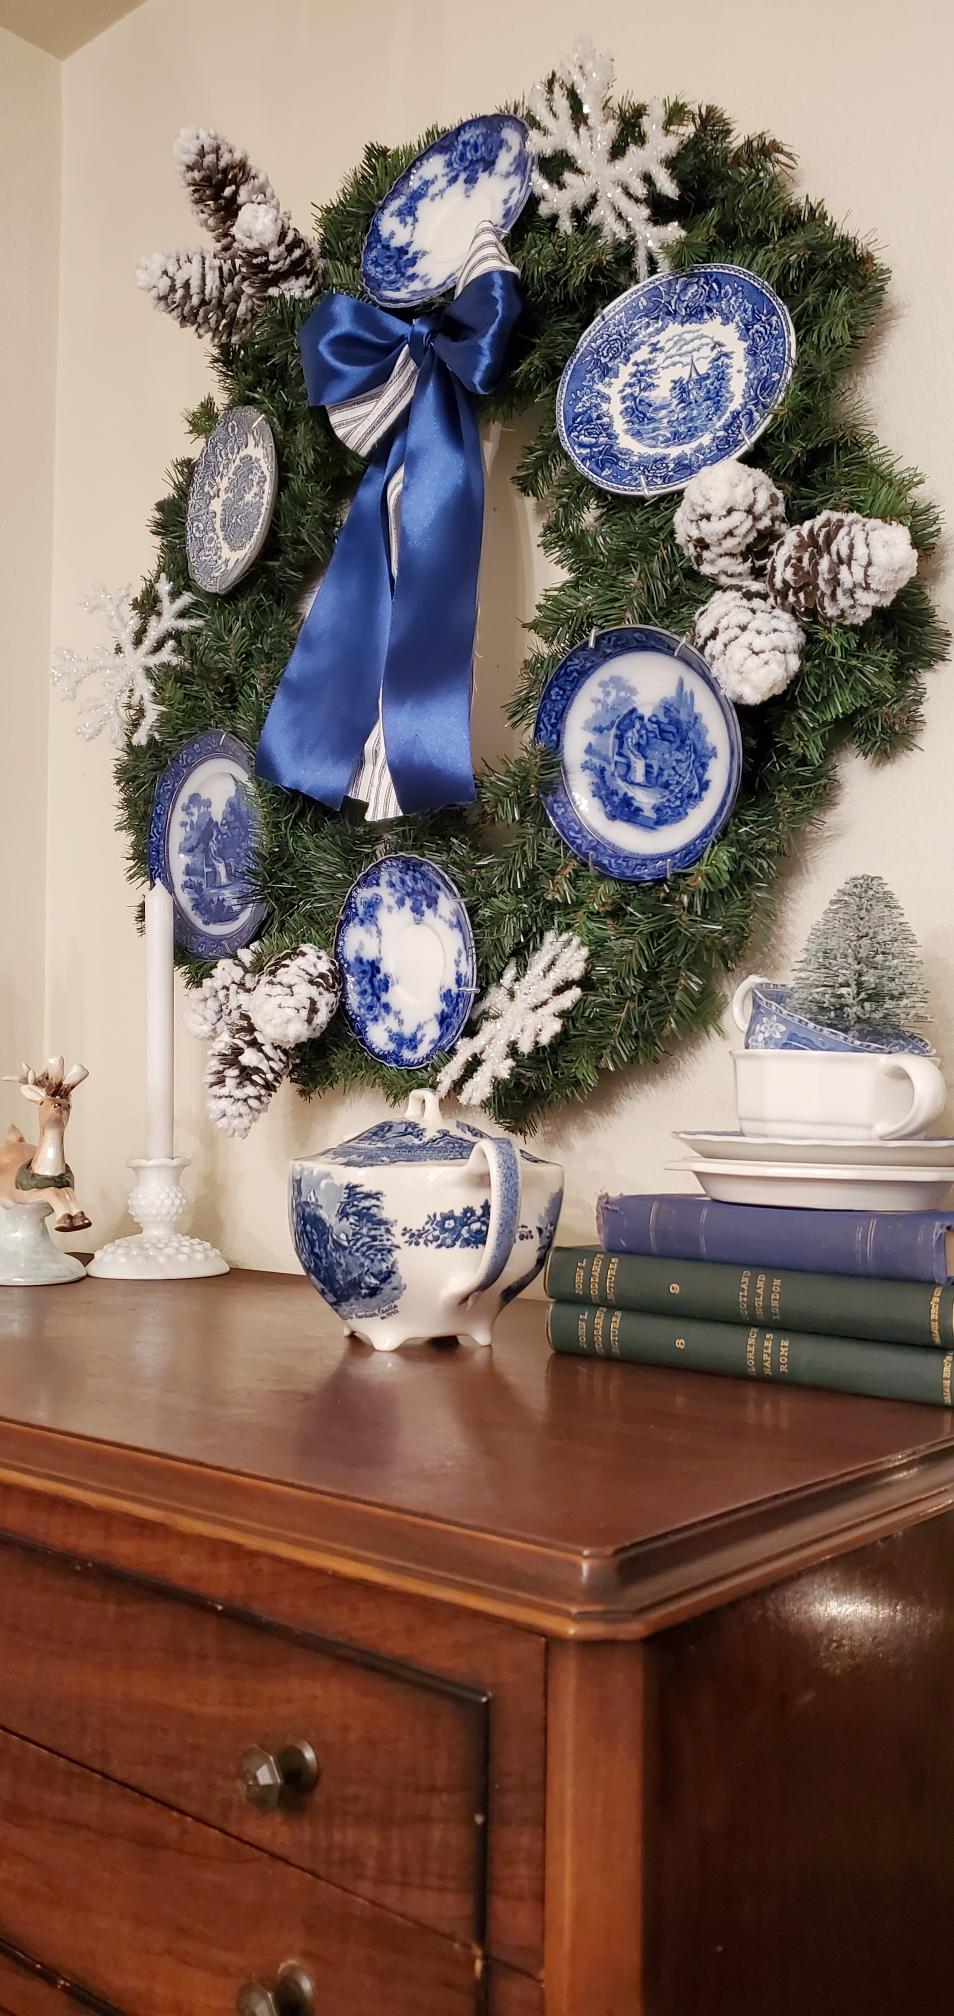
I’ve collected blue Currier and Ives place settings for a while now. Link here.
The pattern is so beautiful!
I love mixing patterns.
When decorating my home, I’ve learned that color brings everything together.
You can have a bunch of different textures or patterns, but if they’re similar in color, it works.
I love that!
Step 6: I added a wooden dough bowl in the middle of the table.
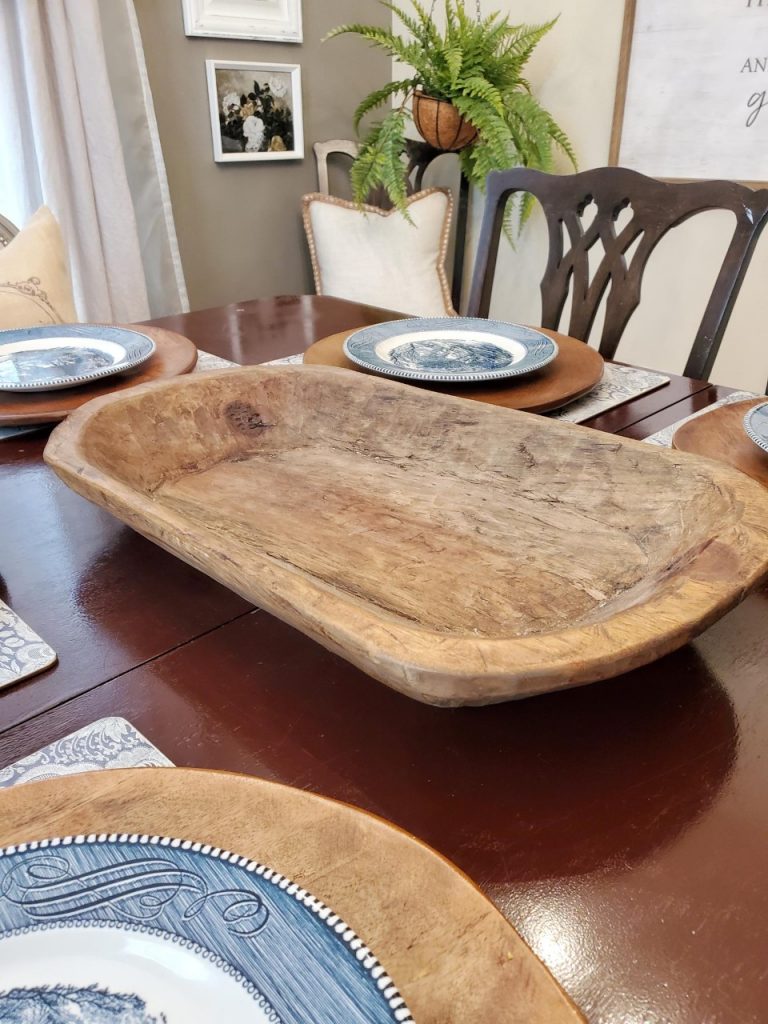
I found this dough bowl on Etsy. Here’s a link to a similar one, here.
It’s been a versatile layering piece I’ve used throughout my home.
Here, I decided to use it to put pumpkins in.
Step 7: Added a white Victorian pitcher inside the dough bowl & large pumpkins.
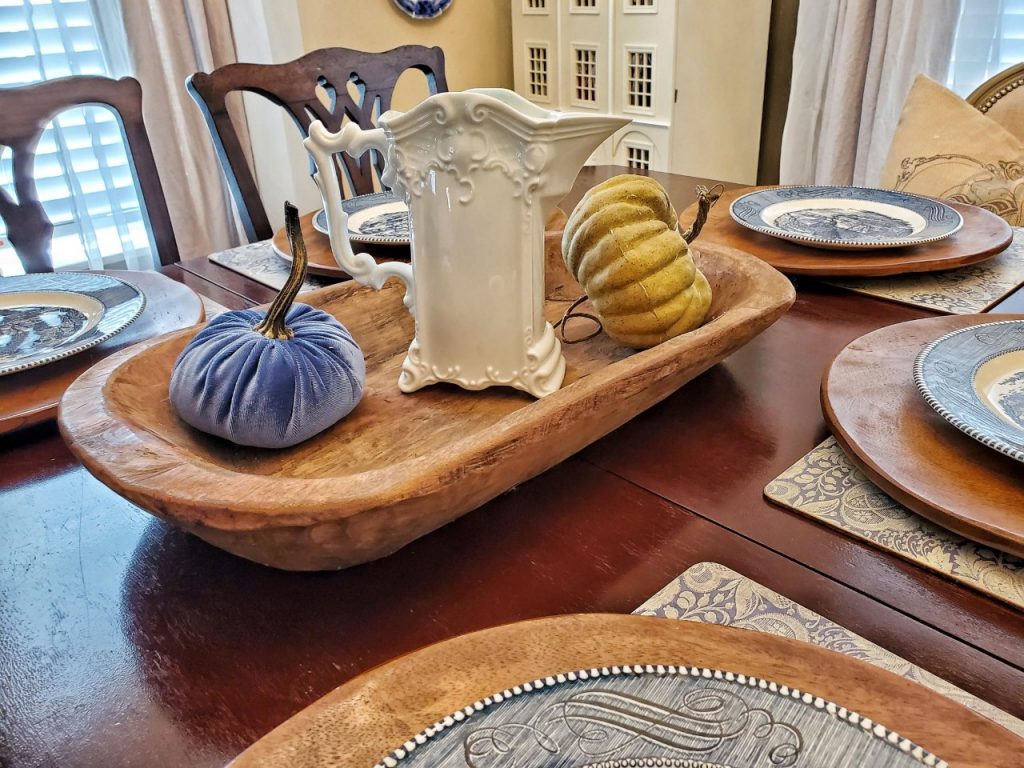
This white pitcher is the epitome of beauty for my love of the Victorian style.
The collision of rustic and Victorian, by placing this in the dough bowl, brings the exact style I love.
I added a large blue velvet pumpkin and a light green pumpkin with a stem on both sides. I found the stem pumpkins at Hobby Lobby.
Step 8: Added a white sunflower with billowing green leaves to the vase.
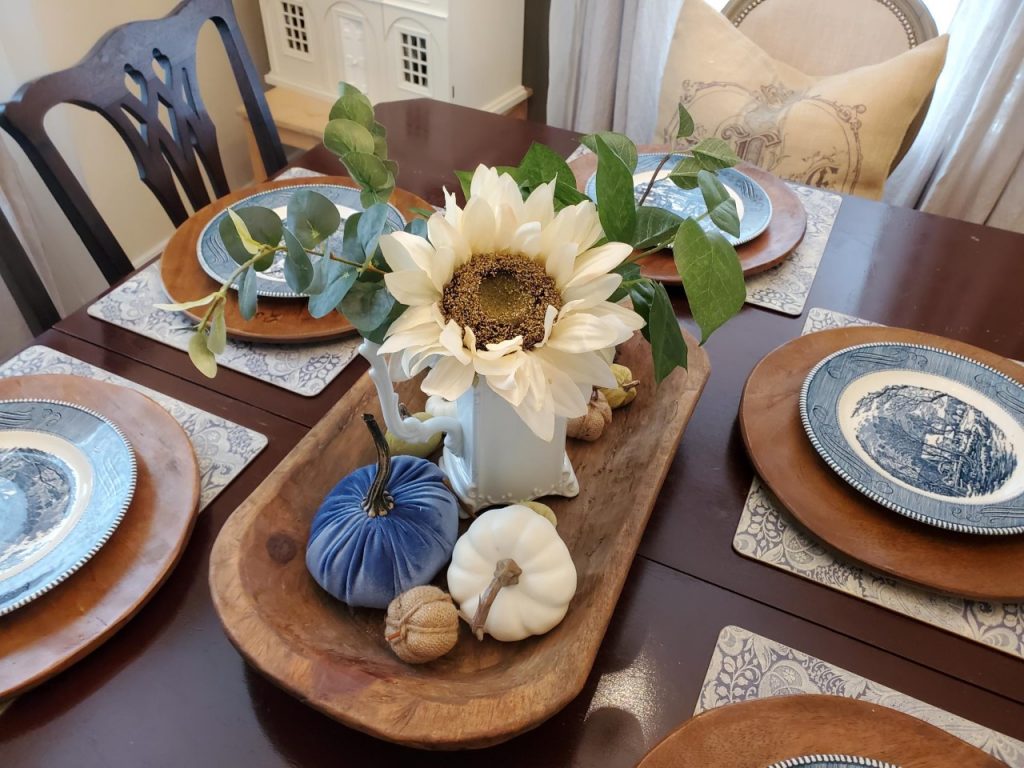
With the blue patterns of the plates and placemats, I want to use white to bring balance.
I tried orange flowers and a fall bouquet, but it was too busy.
Adding this single white sunflower was a perfect choice. Here’s a link to some similar ones.
I found some billowy green leaves to give it a full look.
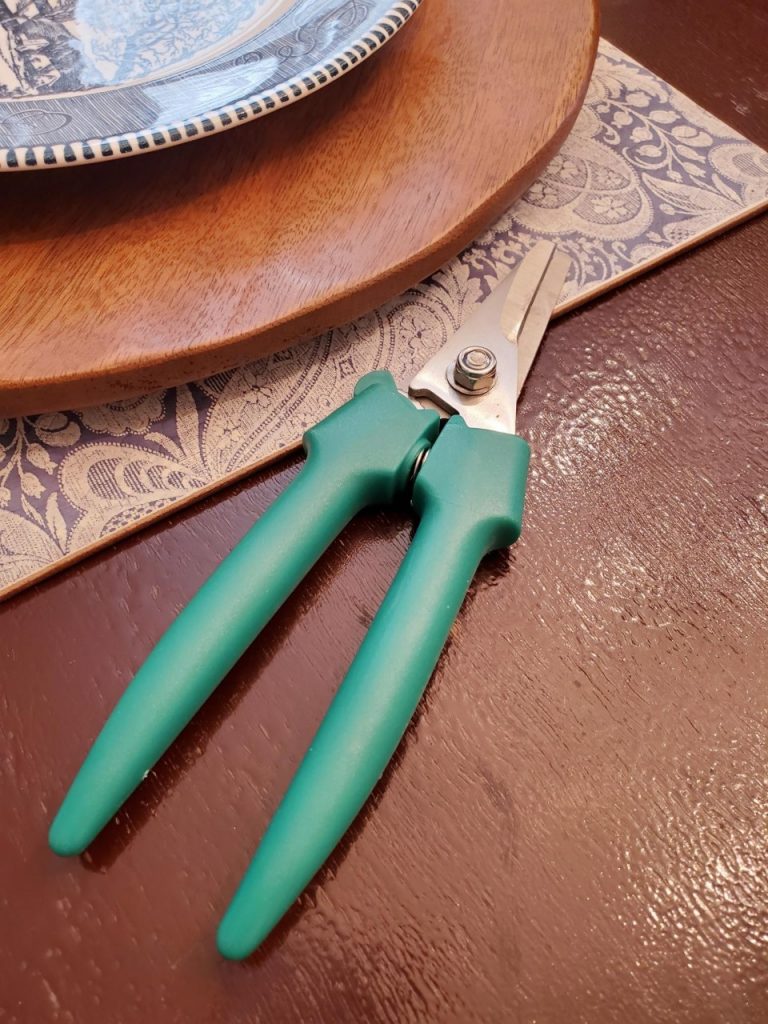
Tip: Get clippers like this when you need something to cut wire stems off faux flowers. Here’s a link to a similar one. It’s so handy, plus it does the job quickly.
Step 9: Layer pumpkins in the dough bowl.
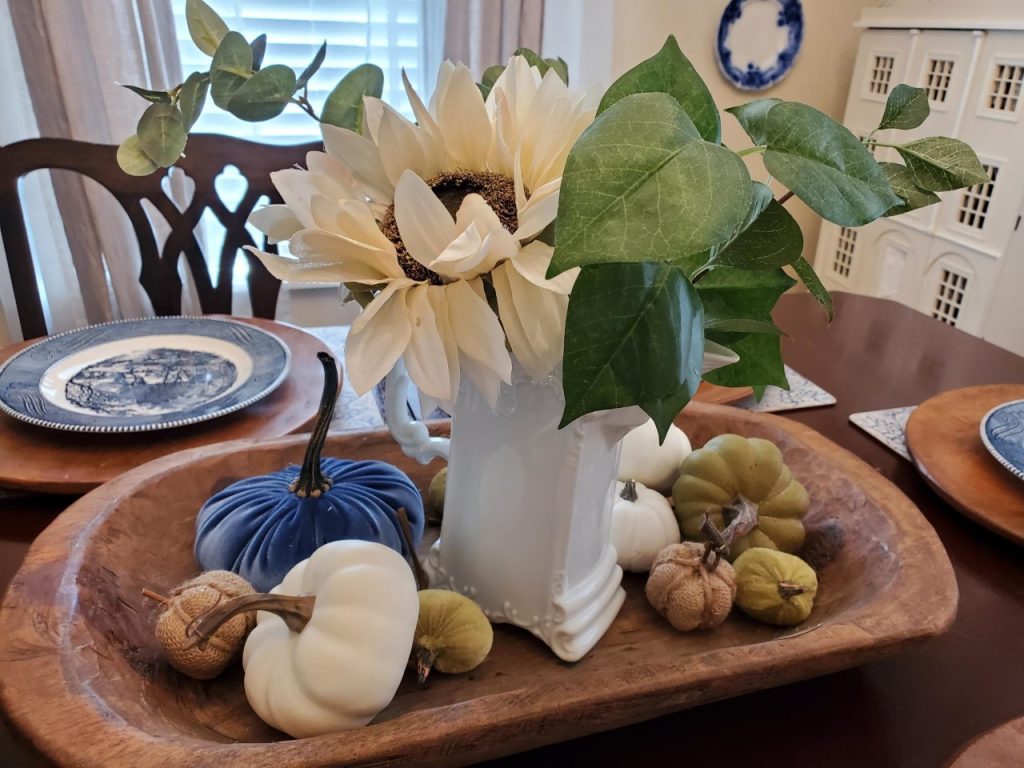
I picked neutral pumpkins.
Taking the burlap, white, and little sage green pumpkins, I laid them sideways. So sweet!
Link to white pumpkins here. And a pack of burlap and white pumpkins here. Adorable!
One blue velvet pumpkin on the left side ties with the other blues. Here’s a link.
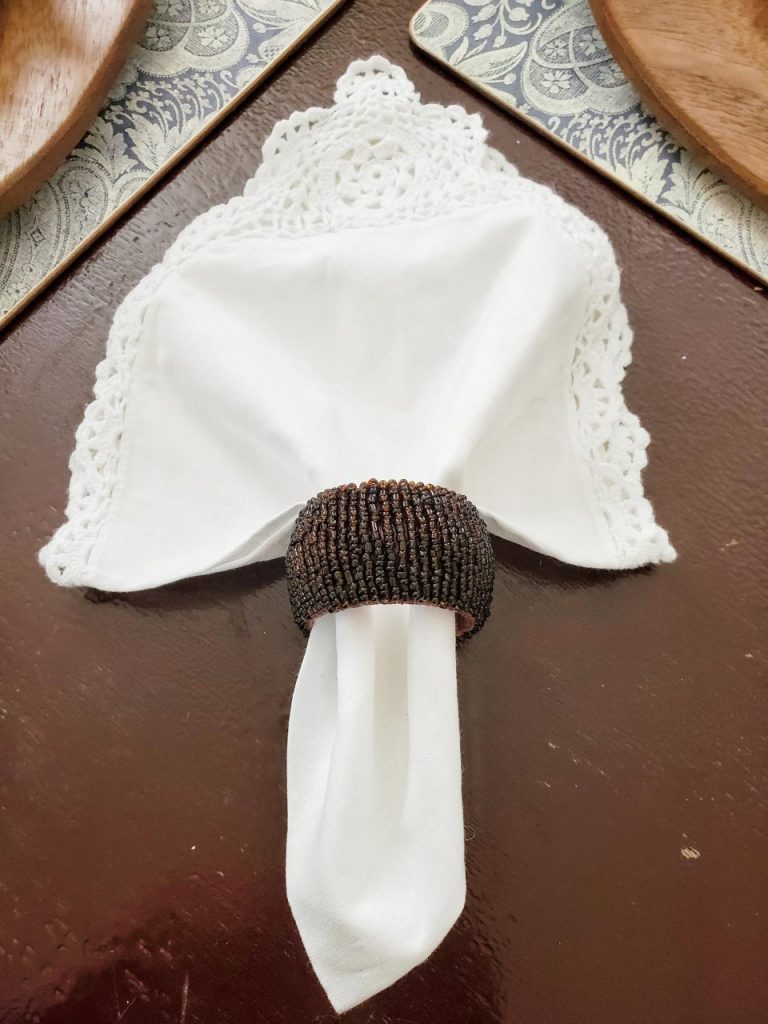
Step 10: Add 6 crisp white lace linen napkins.
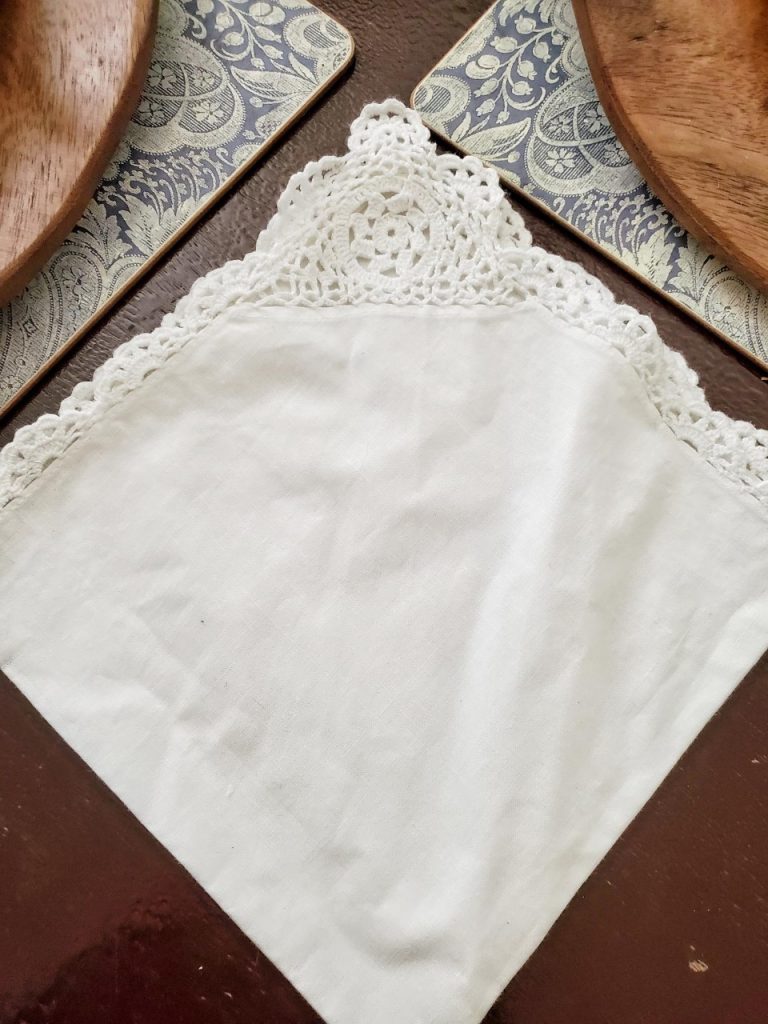
Adding these delicate white lace napkins is like adding jewelry to an outfit.
It’s the finishing touch of elegance that is welcoming and completes this table setting.
I like to fold the linen napkin in fourths. It’s so simple!
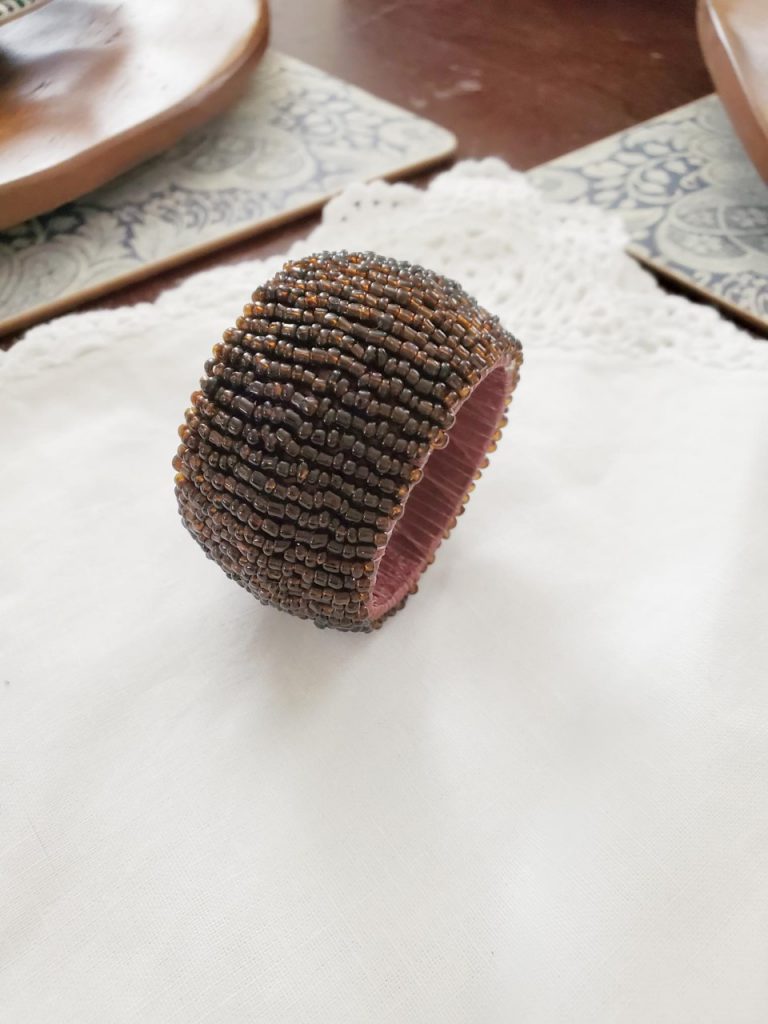
Slide the tip through the hole of the napkin ring and call it a day!
No links for these beauties. These were purchased at an antique store. Here are some that would work great, too. Here’s the link.
Super easy.
Step 11: Place name tags where guests will be seated.
Here’s a TIP for a successful gathering.
Consider who will sit by whom when placing name tags on the table.
This is important for good conversation.
Placing certain guests together that you know get along makes for a successful get-together.
Adding name tags is personalized.
Guests love to see their names.
I had these wooden names made several seasons ago for regular family members who come over yearly for the holidays.
You can use paper or blank gift tags like those below. Link to brown gift tags here.

Take a sharpie and write their name on it.
You can tie it with burlap string or velvet ribbon onto a napkin ring.
These are just some ideas I’ve used in the past.
Here it is all done.
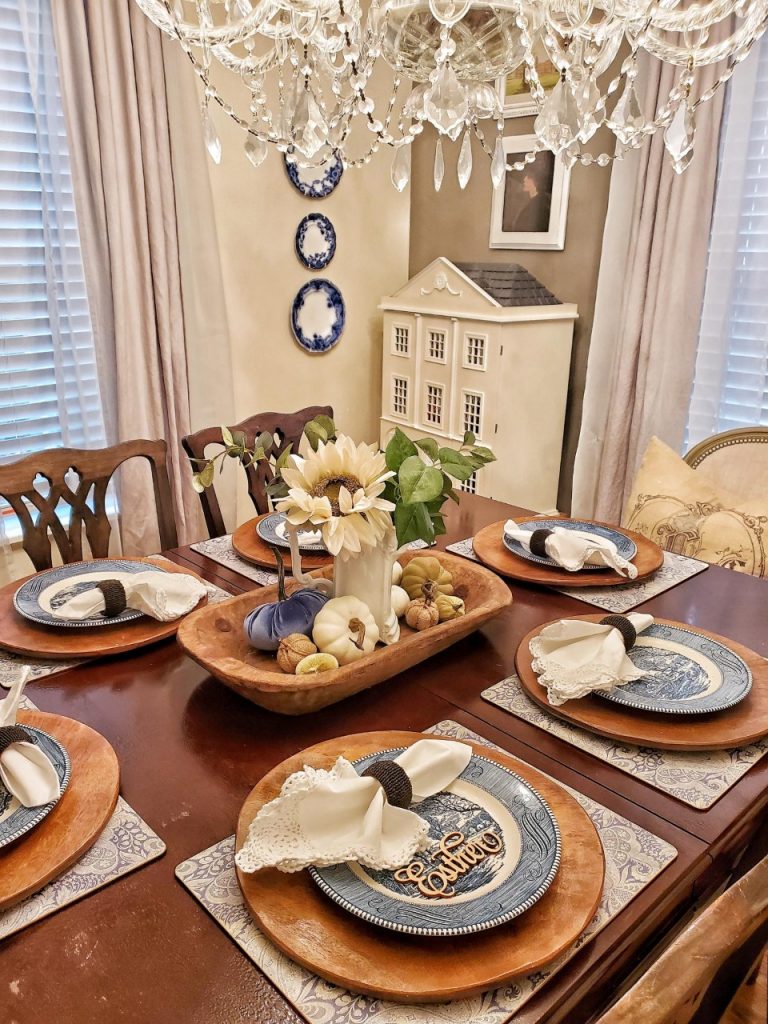
I think it all turned out as I imagined.
It’s simple and easy for everyday use cause of the washable placemats and chargers.
With no tablecloth, this will be super convenient for a quick clean-up between meals.
I love how it turned out.
I didn’t add glasses and silverware yet.
They’ll be added when our guests come over.
I hope you were inspired to set your table for fall.
Please come back soon as I share more fall decorating inspirations.
You can find more seasonal tips here.
Watch these steps as I take you through them on YouTube. Follow this link for my other videos on my YouTube channel.
Thanks for coming by Victorian Lane Farms!