Get Those Spices Organized for Easy Cooking
I’m sharing five steps to get those spices organized for easy cooking.
I use affiliate links in this post.

Look at that photo above!
Does that not make your heart sing?
When getting those spices organized, it’s like our little world looks a little brighter.
Today, I share five steps to get your spice cabinet organized.
Now, I’m not going to lie and tell you these steps are easy.
Step One: Get all your spices out of your cabinet.

I’m embarrassed to share how my cabinet looked before this makeover.
All of my spices were stacked precariously on top of each other.
And yes, we would have jars fall out in our hands.
Sometimes, we’d miss and they’d crash on our granite countertop.
Not a good thing.
Now, don’t tell me yours isn’t that bad.
Am I alone in this?
My husband calls me the spice queen.
I love collecting new flavorful unique spices.

Step 2: Wash your shelving.

I haven’t cleaned out my spice cabinet for a while. Eeek!
If you’re in the same boat, we’re in this together.
But look at that nice clean cupboard now!
It looks so much better already!
Step 3: Prepare the jars, spice rack, and wood shelf.

This is where the tedious work begins.
I bought 2 sets of these cute glass spice jars from Amazon. Here’s the link.
I wanted glass jars with easy pop-off lids.
The seal needed to be strong to keep all those spices fresh.
When I opened the box, I was pleasantly surprised with how these jars fit all of my criteria.
Prepping the glass spice jars.

You can throw yours in the dishwasher.
My dishwasher takes a few hours, so I rolled up my sleeves and washed these all by hand.
I’m not going to lie, this was a lot of work.
But now, they are drying and I can move on to the next step.
Build the Shelf.

I bought this wood shelf for the side of my stove.
There are certain spices I use every day, that I want at my fingertips when I’m cooking.
I wanted something to hold my butter dish, too.
It seemed to float around the kitchen with no home.
Now, it has a home, too, and we can find it easily.
This wood one seemed to have that farmhouse vibe to it.
If you’re looking for something that will fit into your vintage décor aesthetics, this one is it.
Here’s the link.
The shelf came unbuilt.
I pulled out my husband’s Dewalt screw gun and followed the directions.

In about 15 minutes I inserted all the screws.
As you can see in the photo below, it is pretty cool.

Build the Spice Rack.

This is why I said this is not a quick and easy makeover.
But let me tell you!
This spice rack is amazing!
Tip: There are different sizes of spice racks. Measure your cabinet to see which one fits. My cabinet required the smaller one that holds 18 spice jars. You may be able to get the bigger one. Yay you!
When you’re building this spice rack.
Follow the instruction.
You can do this, all by hand, using the tool that is included in the kit.
I know, it seems intimidating when you pull out all the pieces.
But when it’s done you will love having all those spices, all nicely organized in this spice rack.
It will make all the work worth it!
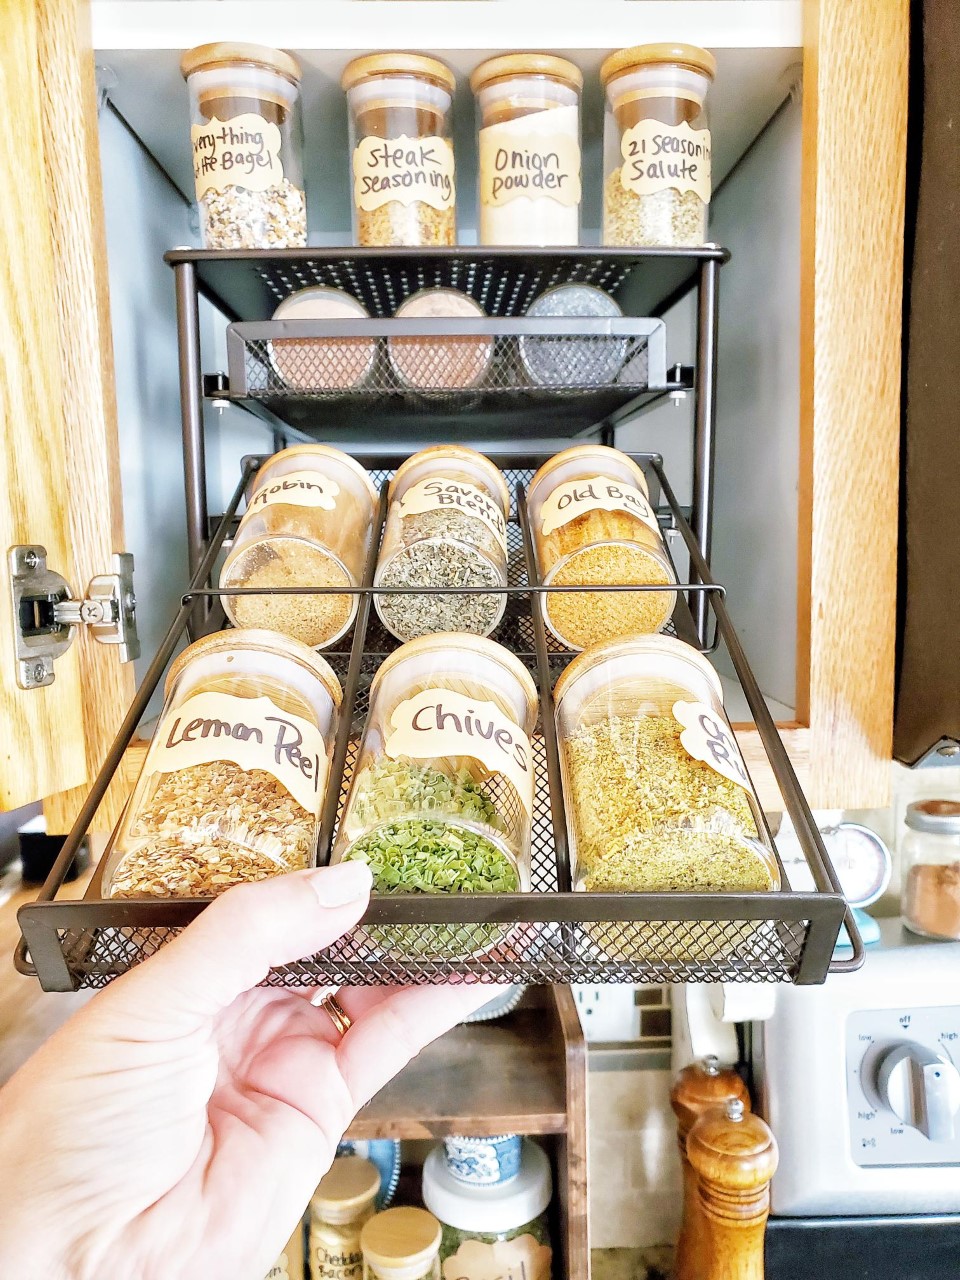
The best part are these little nails on the side.
They hold the drawer from falling out, as you pull out your selected spice jar.
Here it is all done in the photo below.

Spice rack comes in both silver and brown.
Link to the silver spice rack, here. The exact one I used is in brown, here.

For my cabinet, it worked perfectly to put these little spice jars (see photo above) on top of spice rack.
I could have loaded this up with the rest of my spices.
But the point of organizing this spice cabinet is to make it all accessible.
So, I lined just these four jars on top.
I think it worked out great.
Step Four: Fill and label all the glass spice jars.

In the photo above, I show you the old spice jar next to the new one.
It’s a pretty good size.
The ones here are 3.2 oz that fits nicely inside the metal spice rack (link).
There are similar jars like this one on Amazon, that are a bit larger, if you’re needing that. Here’s a link to the 4oz jars, here. And the 6oz jars, here.
By now, all my jars are dry from washing them by hand.
Now, it’s time to label them and fill them up!
Small spice jars.

I start by opening up the old jar.
Next, I empty the contents into this new jar using a small-nosed funnel-like in the photo above. Here’s a link to a similar one and it’s super cheap!
I write on the label, using a black Sharpie (link), the name of the spice I just put in the jar.
Making sure to do one spice jar at a time.
Otherwise, I get the spices all mixed up!

For this project, I used the labels above.
Here’s the link for the small labels.
And here’s the link for the bigger labels I used for the large spice jars.
Tip: Have a garbage can and recycle can near by to put your old jars and plastic jugs in, as you’re filling up the new jars.
Large Spice Jars.

I do the same thing for my large spice jugs.
The typical mason jar seemed to be perfect for these.
I used the large funnel, link here.

Repeat the same way as above.
Pour the content of the old spice jug into the new glass mason jar.
Write the name of the spice, using a black Sharpie, onto the label.
Peel the sticker off, and put it in the glass mason jar.
For most of my jars, I used white plastic mason jar lids (wide mouth link and regular mouth link).
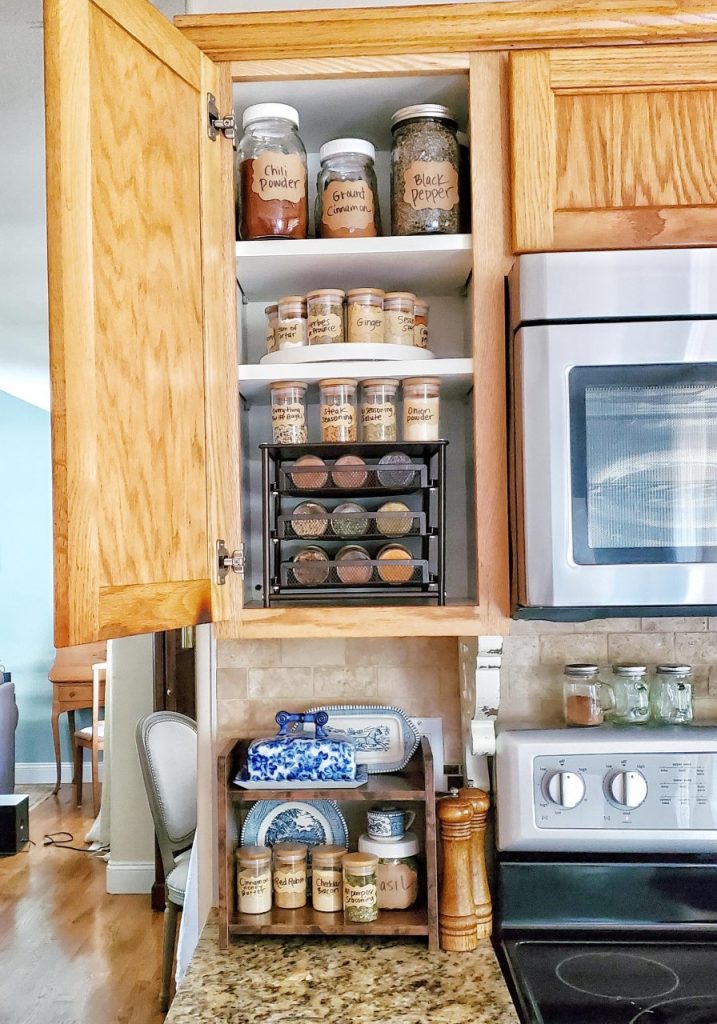
Step five: Place all the jars and mason jars where they need to go.

I put the large mason jars filled with spices on the top shelf as pictured above.
On the middle shelf, I placed the little spice jars onto a round lazy Susan turntable (link).
They fit perfectly on this turntable.
It’s getting more organized! Yay!

I picked my most used spices and placed them inside the metal spice rack.
I have room for 18.
Wow! Look at the photo below.
It’s looking amazing!
All those spices are organized, and ready for easy cooking!
Do you see how easy it is now, to get to my spices?
This is life!
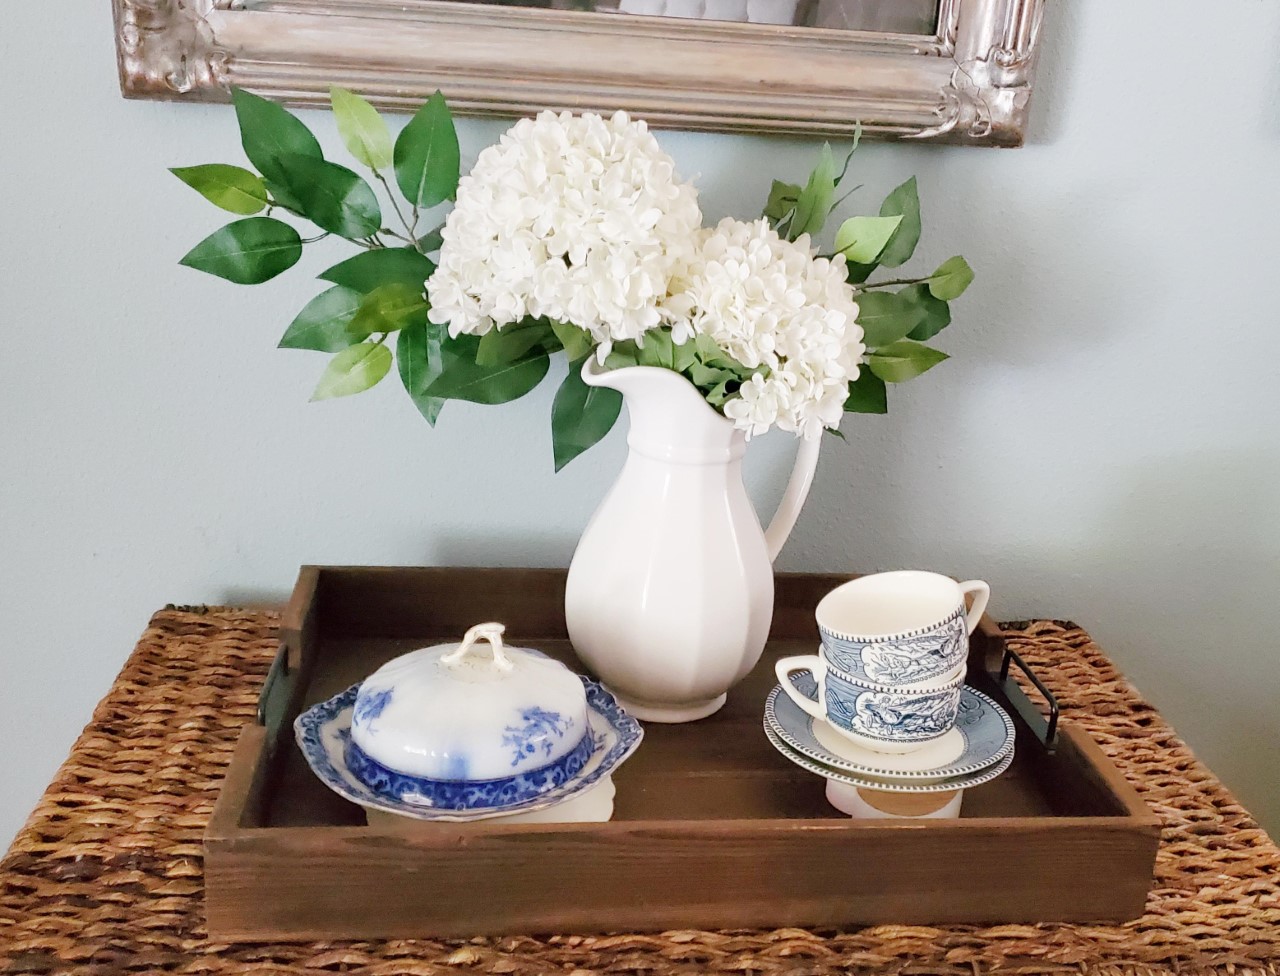
Look below at the photo with the beautiful wood shelf decorated with some of my ironstone transferware.

When putting this all together, the wood shelf seemed bare with just the butter dish and spice jars.
I started brainstorming, which I’m really good at.
This old Currier and Ives butter dish, which I put on the top shelf in the back, seemed to be made for that spot.
To keep it from falling, I secured it with some putty. You can get that here.
I did the same thing on the lower shelf.
I found an old Currier and Ives dessert plate and secured it with putty.
To complete the look, I put this cute little Currier and Ives salt shaker (link) on top of the mason jar holding my dried Basil.
I think this completed the look of this shelf.

In the photo above you can see the full view of how this wooden shelf looks in my kitchen. It’s so nice!
The wooden salt and pepper grinder set (link), on the right side of the shelf, I bought from Amazon many years ago.
They fit perfectly in that small area!
It all came together beautifully!
Here’s the final view of this spice cabinet makeover.
It looks more organized!
And it’s super easy to get cooking!
I love the jar tops that pop off easily.
No more twisting!
What a process to get here.
But I can say every step was worth it!
And I can tell you that you’ll be super stoked when it’s all said and done, too.
Get those spices organized for easy cooking, my friend!
Follow this link for more housekeeping tips.
If you like this tutorial on getting your spice cabinet organized, please comment below.
For more inspiration to make your home beautiful, here you can see my DIY projects.
Plus, I share some amazing Thrift Finds, here, to stick to a budget.
My motto is it doesn’t have to cost a lot of money to make your home beautiful.
Here’s a video if you’d like to see some of my amazing finds at a thrift store.
Thank you for coming by Victorian Lane Farms.
Bye for now!


This is excellent, thank you so much for the detailed tutorial. I’m not sure how to save it but I will figure something out. I redid my spice cupboards several months ago but it was with plastic shelves that go on 3 sides of the cabinet. They aren’t very strong though so this is something I would love to do. Now I want to browse the rest of your site! And..I go through the same thing with my wandering butter dish.
Glad you liked it. It’s definitely nice to have the convenience of all my spices next to the stove. Plus, you’re right. The metal spice rack is very sturdy. It’s been a great addition to my makeover. I’d love to know if you go this route. Thanks for browsing my website. Have an amazing day.