Super Easy Fall Basket DIY with a Trick
Today I’m sharing a super easy Fall basket DIY with a trick.
First, I am so grateful for this season. It’s the beginning of the celebration for our family.
October is super special because our daughter’s birthday sets off our family gatherings.
You can imagine I’m running around getting things ready for that!
I thought I’d whip up this fall basket to get my home to look festive for the Fall season.
I had to order Fall things from Michaels because their store shelves were bare.
Now, I have what I need!
I put this together quickly. It took 20 minutes!
I hope you enjoy this super easy Fall basket DIY with a trick.
Below I will take you step by step on how I put this Fall basket together.
You may have some of these things already, but if you don’t, I will share some Michaels links (non-affiliate) for the items I used for this project.
And yes, there is a trick!
I use something to give the basket volume. Scroll down to see what the trick is!
Things you will need:
- Basket

- White Flowers

- Fall mini pumpkin bush

- Small wood sign

- Large Pumpkin with stem

- 2 burlap pumpkins with stems

- Trick – secondary basket to put into a large basket

Step 1: TRICK is to put a secondary basket inside the large basket.

This secondary basket is the TRICK!
It will serve as a filler, so you can have all the beautiful things sticking out!
Plus, it will be what we stick our stems in for Step 3.
That’s why you need the pumpkins to have stems as well.
So you can stick them into the basket.
Step 2: Cut the stems of the flowers and mini pumpkin bush.

Using a wire cutter, cut all the stems to about 10 inches. Or you can eyeball it like I did.
Cut all the stems apart from the main cluster of the bush or bouquet.
We’re separating them to spread them out to get that full look.
No need to cut the pumpkin stems; you want those nice and long to be able to stick them in.
The burlap pumpkins will protrude a bit. You will see that in a few photos below.
Step 3: Put the cut stems into the gaps of the basket.

For this step, we are sticking the stems into the back of the basket.
The gaps in the wicker make it easy to push the thin stem into it.
I start with the Fall mini pumpkin bush by placing them on the sides.
Step 4: Put the white flowers in next.

For the white flowers, I place them ununiform.
I put a few in the front and on the sides.
I put one of the white flowers on top to give it a finished look.
Make sure to leave a gap in the middle for the big green pumpkin and small little orange sign.
Step 5: Stick the two burlap pumpkins into the sides of the basket.

Place the two burlap pumpkins on each side of the basket.
I want this to protrude a bit above the flowers.
So, no need to cut the stems.
You can adjust the height by pushing the burlap pumpkins into the gap of the back of the basket by going up or down.
Step 6: Place the large green pumpkin with a stem into the middle.

You’ve left room for the big green pumpkin.
Make sure the stem is straightened.
Push the stem into the gap of the basket.
Keep pushing the pumpkin until it is secure and sitting where you want it.
Step 7: Add the “Hello Pumpkin” sign next to the big pumpkin.

Pushing the flowers, mini pumpkin bush, and big pumpkin aside, place the sign tightly into the side of the big green pumpkin.
To get it secure, keep pushing until you feel it not move.
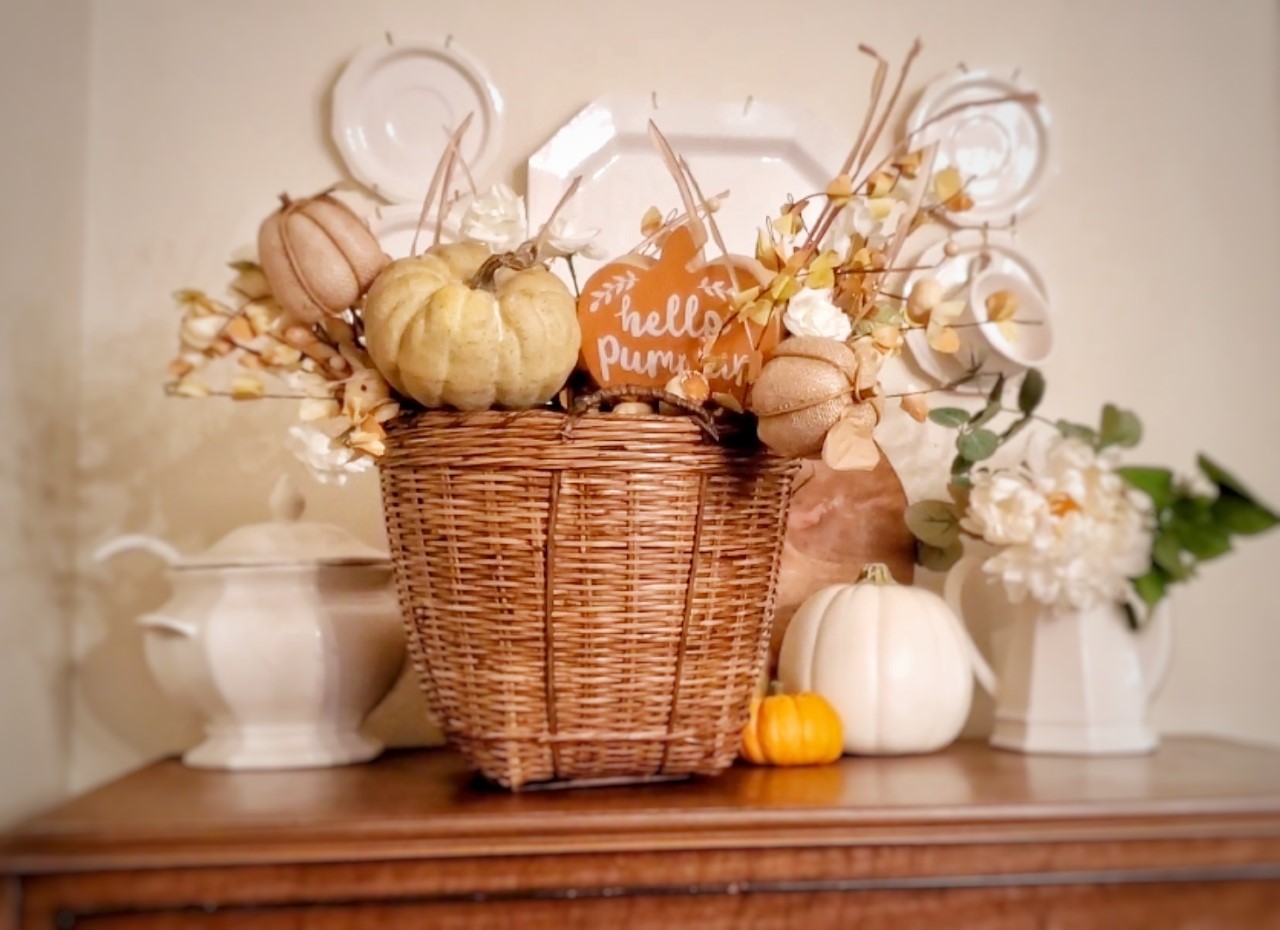
You are now done!

Wow! What a great job!
This looks so Fall like with the neutrals, and that sweet little “Hello Pumpkin: sign adds such a nice touch.
It looks amazing!
I hope you liked this super simple Fall basket DIY.
Please comment below if you give this a try.
If you’re a visual learner, you can get these steps by watching my YouTube video on putting this basket together.
I have another post of a Fall Wreath I put together using the Magnolia Market wreath. I give it a makeover! You can see that here.
Also, you can get 3 Last Minute Ideas to bring fall to your home here.
Thanks for coming by Victorian Lane Farms.
Until next time. Bye for now!


Beautiful Basket. Easy to do.
Thank you. It was a fun project. Thanks for coming by!